How to Crate Train a Dog and Why It Can Be Beneficial
A crate can look like a little cage to people, but to a well-trained dog it can feel more like a bedroom. The difference is how you introduce it.
Crate training works best when the crate becomes a safe, calm place, not a punishment. Done with patience, it can help with house training, reduce stress during travel, protect your home from chewing, and give your dog a cozy place to rest.
The key is to move slowly. Some dogs walk into a crate on day one and settle right down. Others need several days or weeks before they feel comfortable. Both are normal.

Why crate training can be good for dogs
Crate training is not about shutting a dog away for convenience. It is about building a familiar space your dog trusts.
Dogs often like small, sheltered areas where they can rest without being bothered. A crate can meet that need when it is introduced kindly. It also gives structure during moments when a dog needs help making good choices.
A crate can be helpful for:
House training
Many dogs prefer not to soil the area where they sleep. A properly sized crate can support a regular potty routine.
Preventing unsafe chewing
Puppies and young dogs explore with their mouths. A crate can keep them away from cords, shoes, trash, and other hazards when you cannot supervise.
Creating a calm resting spot
Busy homes can overwhelm dogs. A crate gives them a place to relax away from noise, guests, or other pets.
Travel and vet visits
Dogs who already feel comfortable in a crate often handle car rides, boarding, grooming, and vet stays with less stress.
Recovery after illness or surgery
Some dogs need restricted movement while healing. A crate-trained dog may cope better if rest is ever needed.
Helping with routine
Dogs thrive when they know what to expect. A crate can support nap times, bedtime, and short periods alone.
A crate should never replace exercise, training, play, or time with family. It is a tool, not a lifestyle. Dogs still need walks, sniffing, training, social time, and affection every day.
Choose the right crate before you start
The right setup makes the training process much easier.
Your dog’s crate should be large enough for them to:
Stand up without crouching
Turn around comfortably
Lie down fully on their side
It should not be so large that one end becomes a bathroom and the other becomes a bed. For puppies, an adjustable crate with a divider can work well because you can increase the space as they grow.
Common crate types include:
Crate type | Best for | Things to know |
Wire crate | Most home training | Good airflow and visibility |
Plastic crate | Travel and cozier rest | More enclosed and den-like |
Soft-sided crate | Calm, crate-trained dogs | Not ideal for chewers or escape artists |
Indestructible crates | For dogs that chew up and destroy crates. | If a dog isn't settling in a crate you can put a sheet over the crate to make it den like or you an leave talk radio or the TV on low to help it calm down. |
Add a comfortable mat or bed if your dog will not chew or swallow it. For puppies who are still learning, use washable bedding. Keep water available nearby, and ask your vet about water access during overnight crating or long stays, especially for puppies, seniors, or dogs with medical needs.
Place the crate in a quiet but not isolated area. A family room corner, bedroom, or low-traffic spot often works well. Dogs usually settle better when they feel included, especially at the start.
Step-by-step crate training
The goal is simple: teach your dog that the crate predicts good things. Food, rest, safety, and calm.
Move at your dog’s pace. If your dog seems scared, backs away, drools, pants heavily, barks nonstop, or tries to escape, slow down and make the next step easier.
1. Make the crate inviting
Start with the door open. Do not close it yet.
Put a soft blanket or mat inside. Toss a few treats near the crate, then just inside the entrance. Let your dog explore without pressure.
If your dog only sniffs the outside, that still counts as progress. Praise calmly and let them leave when they want.
You can also place favorite toys near the crate. The idea is to make the crate part of everyday life, not a strange object that appears only when your dog is about to be confined.
2. Feed meals near the crate
Food builds positive feelings quickly.
Start by placing your dog’s food bowl near the crate entrance. Once they are comfortable eating there, move the bowl just inside. Over time, place it farther back.
If your dog willingly steps inside to eat, let them. Keep the door open during the first few meals. This teaches your dog that going into the crate does not always mean the door closes.
For nervous dogs, go slower. Even eating a few feet away from the crate may be the right first step.
3. Add a cue for going inside
Once your dog is comfortable entering the crate, add a simple cue.
Good options include:
“Crate”
“Bed”
“Kennel”
“Go home”
Say the cue once, then toss a treat inside. When your dog walks in, praise them. Let them come right back out.
Repeat this in short sessions. Keep it light and upbeat. A few minutes at a time is enough.
Try not to push your dog in. Forced entry can damage trust and make the crate feel scary.

4. Close the door for a few seconds
When your dog enters willingly, close the door for just a moment. Drop a treat through the crate bars, then open the door before your dog gets worried.
Start with 2 or 3 seconds. Then try 5 seconds. Then 10.
The best time to open the door is when your dog is calm. If your dog whines, wait for a tiny pause if you can, then open the door without making a big fuss. Next time, make the session shorter.
This step is where many people move too fast. Short, successful sessions build confidence. Long, stressful sessions teach the opposite.
5. Keep your dog busy inside
Once your dog can handle the door being closed briefly, give them something safe to enjoy inside the crate.
Good options may include:
A durable chew
A treat-stuffed toy
A lick mat, if supervised and safe for your dog
A small handful of kibble scattered in the crate
Choose items that fit your dog’s chewing habits. Avoid toys that can break into dangerous pieces or bedding that your dog may shred and swallow.
The goal is for your dog to think, “Good things happen in here.”
6. Practice while you stay nearby
Sit near the crate while your dog relaxes inside. Read, watch TV, fold laundry, or do something quiet.
Start with a few minutes. Then build up slowly.
If your dog settles, praise softly. If they fall asleep, even better. Nap time in the crate is a major milestone.
This step teaches your dog that a closed crate does not mean they have been abandoned. You are still nearby, and nothing bad happens.
7. Leave the room for short periods
Once your dog can rest calmly while you are nearby, try stepping out of the room.
Start with very short absences:
Walk out for 5 seconds
Return calmly
Drop a treat if your dog stayed relaxed
Repeat later for 10 seconds, then 30 seconds, then 1 minute
Do not make departures emotional. A cheerful but calm tone works best. Big goodbyes can make some dogs more anxious.
If your dog becomes upset the moment you leave, go back to easier practice. Some dogs need many repetitions before they feel secure.
8. Use the crate for short daily routines
Now start using the crate in normal life.
You might crate your dog while you:
Shower
Cook dinner
Take out the trash
Work in another room
Help kids with homework
Give another pet some attention
Keep sessions reasonable. Puppies need frequent potty breaks. Young dogs also need movement, training, and play before they can settle.
A tired dog with an empty bladder will usually handle crate time better than a restless dog full of energy.
9. Try bedtime crating
The crate can be a great bedtime tool, especially for puppies.
At first, place the crate near your bed or close enough that your dog can hear and smell you. This helps them feel safe. Over time, you can move it to the desired location if you prefer.
Take puppies out for potty breaks when needed. Keep nighttime trips boring and calm. Go outside, give them a chance to potty, then return to the crate.
Avoid playtime at 2 a.m. unless you want your dog to learn that midnight wake-ups are party time.
10. Build up alone time carefully
Once your dog is comfortable with short crating, you can slowly increase the time.
Before longer crate sessions, make sure your dog has had:
A potty break
Age-appropriate exercise
A chance to sniff and explore
Water, as appropriate
A safe chew or enrichment item
Do not jump from 10 minutes to 3 hours. Increase time gradually.
For adult dogs, many can handle a few hours of crate time when properly trained and exercised. Puppies need much more frequent breaks because their bladders are still developing. Senior dogs may also need shorter sessions.
If your dog panics in the crate, tries to escape, injures themselves, or shows strong distress, stop and get help from a qualified trainer or veterinarian. Severe separation distress is not solved by simply “letting them cry it out.”
How long can a dog stay in a crate?
Crate time should be limited and balanced with plenty of life outside the crate.
A crate is useful for rest, safety, and routine. It should not be where a dog spends most of the day. Dogs need movement, social time, enrichment, potty breaks, and training.
A simple guide:
Dog’s age or stage | Crate time guidance |
Young puppy | Short sessions with frequent potty breaks |
Older puppy | Gradually longer sessions, still with regular breaks |
Healthy adult dog | A few hours when needed, with exercise before and after |
Senior dog | Shorter sessions based on comfort and health |
Every dog is different. Size, health, bladder control, activity level, and training history all matter.
If you work outside the home all day, plan for a dog walker, pet sitter, dog daycare, lunch break visit, or safe dog-proofed area instead of relying on the crate for too long.
Common crate training mistakes to avoid
Crate training works best when the crate stays positive. These mistakes can set progress back.
Using the crate as punishment
If the crate only appears when your dog is “in trouble,” they will not see it as safe.
It is fine to use the crate for calm-down time, but keep your tone neutral. Do not yell, scold, or drag your dog inside.
Moving too fast
A dog who looks calm may still feel unsure. Build slowly. Repeating easy wins is better than rushing into a stressful session.
Crating without enough exercise
A dog who has spent all day resting may not want to rest more. Meet your dog’s physical and mental needs first.
A walk, sniffing game, short training session, or food puzzle can make crate time much easier.
Letting the crate become boring or lonely
Use treats, safe chews, praise, and calm routines. The crate should not feel like isolation. For many dogs, it helps to keep the crate near family activity, especially during training.
Ignoring signs of distress
Some whining is normal during adjustment, especially with puppies. Panic is different.
Watch for intense barking, drooling, escape attempts, shaking, heavy panting, or refusal to enter the crate after previous sessions. These signs mean your dog needs a slower plan or professional support.
What success looks like
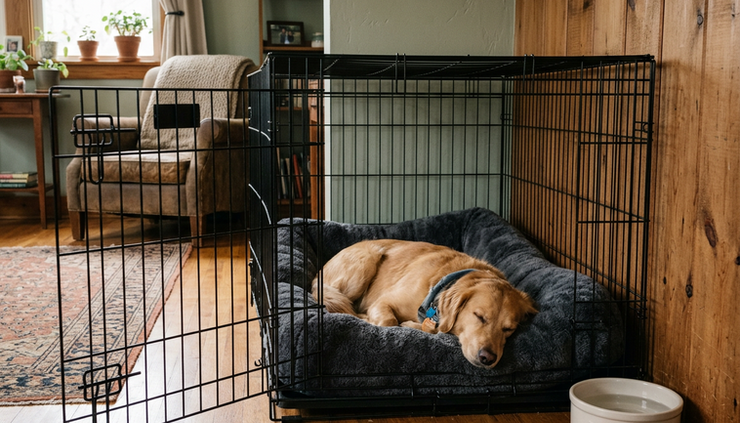
A crate-trained dog does not have to love the crate every second. Success means your dog can enter willingly, settle calmly, and rest safely for appropriate periods.
You may notice your dog:
Goes into the crate on cue
Chooses to nap there with the door open
Stays relaxed when the door closes
Sleeps through the night
Handles short alone-time better
Recovers faster after excitement
These are signs that the crate has become familiar and safe.
A simple sample crate training schedule
Use this as a flexible starting point. Some dogs will move faster. Others will need more time.
Day | Main goal | What to practice |
Day 1 | Build curiosity | Treats near and inside the open crate |
Day 2 | Create comfort | Meals at the crate entrance or just inside |
Day 3 | Add a cue | Say “crate,” toss a treat, let your dog exit |
Day 4 | Close the door briefly | Shut the door for a few seconds, then open |
Day 5 | Add calm time | Sit nearby while your dog rests inside |
Day 6 | Step away | Leave the room for short, easy moments |
Day 7 | Use real routines | Try short crate sessions during daily tasks |
This schedule is not a deadline. If your dog struggles on day 4, go back to day 3. Progress is still progress.
Final tips for making the crate feel safe
Small details matter.
Keep the crate clean. Use bedding your dog enjoys. Avoid placing the crate in direct sun, near loud appliances, or in a drafty spot. Make sure children know not to climb inside, shake the crate, or bother the dog while they are resting.
Leave the door open sometimes when the crate is not in use. This allows your dog to choose it voluntarily.
Most of all, pair the crate with calm, pleasant moments. A treat. A chew. A nap. A quiet bedtime routine.
Crate training is not about control. It is about teaching your dog that they have a safe place in the home. When you build that trust step by step, the crate becomes more than a training tool. It becomes a place where your dog can relax, reset, and feel secure.


Comments